Who invented the Colomba? This question is easily answered: Dino Villani, Motta’s advertising director, who in the 1930s, had the vision of reshaping classic panettone dough. His goal was to increase the production plant’s operating hours, which until then had been too dependent on the Christmas season.
To emphasize the connection with the solemnity of Easter, the leavened product was given the shape of a dove, Colomba in Italian, which in the Christian faith symbolizes the Holy Spirit.
As just mentioned, Colomba and Panettone are based on the same dough, but their are some significant differences in their preparation methods. In this article, we’ll give you a series of tips and tricks that, combined with a good starting recipe, will allow you to achieve a result which is up there with the finest of artisanal Colomba.
For each step in the Colomba’s preparation, we’ll provide various tips, suitable for both professionals who want to improve their recipes and enthusiasts who aim to create a top-quality Colomba in their kitchen at home. Let’s get started!
Step 1: preparing the sourdough starter for the Colomba
The naturally leavened Colomba is the classic version of this highly leavened Easter cake, and a Ministerial Decree, the first version of which dates back to July 22, 2005, even tells us so:
The name “colomba” is reserved for a soft baked confectionery product, obtained through natural fermentation of sourdough, with an irregular oval shape similar to a dove, a soft structure with elongated air bubbles, a glaze on top and a decoration of sugar granules and at least two percent almonds, compared to the weight of the finished product at the time of decoration.
Proper management of the sourdough starter is certainly one of the most important factors in ensuring a successful Easter Colomba. The “free” method is undoubtedly one of the most widely used and appreciated because it forms a very rigid and compact gluten network, which allows large leavened products, such as the Colomba, to rise vertically.
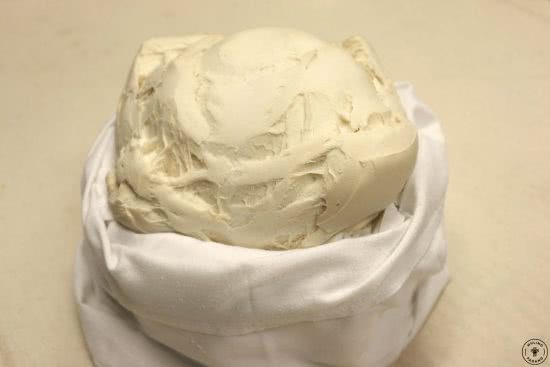
The sourdough starter used in the dough must be strong and in excellent condition. It will be clear that these conditions have been satisfied when, after the second or third refreshment, a cross-shaped incision made in the dough opens up and, due to the strength of the dough, produces the characteristic “blooming”, like to a rose, as shown in Figure 1. To achieve this result, it’s essential to choose the right refreshment flour, which must be strong and well-balanced, like our type “00” Panettone flour. If this dramatic effect, typical of a fully matured starter, hasn’t manifested itself, it’s best not to begin preparing the Colomba.
If you don’t have a sourdough starter, but would like to make a highly leavened cake like Colomba, then we suggest reading our article in which we explain how to make a highly leavened cake starting from the creation of the sourdough starter.
Colomba dough variations: biga and li.co.li.
As we have said, Easter Colomba with sourdough starter is certainly the classic version, but some professionals prefer to base their recipe on the use of biga or li.co.li., a type of natural yeast characterized by a 1:1 ratio of flour and water.
In the first case, the biga should be added to the dough in the same quantity as the sourdough starter. The li.co.li. should also be substituted in equal quantity as the sourdough starter, but requires two precautions:
- three refreshments are necessary before using it in the recipe, to produce the right strength
- the quantity of water in the first mix must be recalibrated, due to the liquid nature of the li.co.li.
These two alternative choices lead to some changes to the method used in the original recipe, as will be explained below, but do not compromise the success of the outcome.
We do not, however, recommend the use of a direct dough, as it would have a higher pH than an indirect dough, which would prevent the correct formation of the highly leavened dough’s structure.
Step 2: the dough for a classic Colomba
The Colomba recipe is divided into two dough batches, regardless of whether you use sourdough starter, li.co.li., or biga. Otherwise, the high fat content would prevent the dough from rising.
The first dough batch for Easter Colomba
This initial kneading should last approximately 20 minutes with a spiral mixer (a few minutes longer if using a hand mixer), and the final temperature of the dough should not exceed 27 °C. It being any hotter could lead to two problems: the gluten net breaking or difficulty in incorporating the fat.
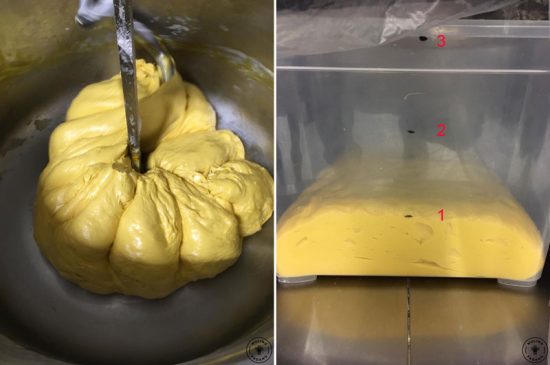
At the end of the first kneading, the dough should be placed in a container, covered with nylon film, at a temperature of 28 °C. Within twelve hours, the dough should expand to one and a half times its initial volume. As you can see in Figure 2, the top of the dough should reach approximately level 3.
Problems with proofing the first batch of dough: how to solve them
If the dough were to rise beyond this level, there would be a high risk of ruining all the work done up to this point. The consequences would be felt during the second kneading, the mixture would struggle to form a dough due to the degradation of the gluten having occurred during the proofing of the first batch.
However, with a few clever adjustments, the damage can certainly be limited. In particular, it may be helpful to add double the amount of flour to the second dough and consequently adjust the fat ratio accordingly by adding butter.
If, on the other hand, at the end of the twelve hours the dough has not increased to one and a half times its initial volume, then it will be sufficient to extend the proofing time of the dough in the moulds.
The second dough batch for Easter Colomba
After twelve hours, the first dough should have risen by one and a half times. At this point, you can proceed with the second mixture, but before placing the proofed dough in the mixer, it’s helpful to take two precautions to ensure the temperature doesn’t exceed 27 °C. This is no small task, considering the second kneading lasts approximately 40 minutes.
- First, “deflate” the leavened dough, eliminating the air inside by pressing its surface with your hands. This will make the dough lose volume and the following action will be more effective.
- Leave the dough for 30 minutes in a refrigerator cell at 4 °C or, for those preparing the Colomba at home, in the fridge.
Once these two steps have been completed, you can proceed with the second dough, with a little more certainty regarding temperature control.
The importance of the ingredients
To ensure the recipe’s success, it may be helpful to add diastatic malt to the ingredients in the second mixture: 0.4% of the total weight of the first batch will allow you to recover the proteins and starches degraded during the first mix and help the final proofing.
Regarding the ingredients for the second mixture, we recommend the use of fresh egg yolks, rather than canned ones, if possible, as the pasteurization used to process canned egg yolks degrades the proteins, making it difficult to incorporate them into the dough. Furthermore, it is a good idea to alternate the addition of egg yolks with that of the sugar, so that the hygroscopic power of the latter is counteracted.
If the sugar is added all at once, in fact, there is a risk of finding a significant quantity of liquid extracted from the dough by the sugar in the mixer.
To conclude this chapter on ingredients, it’s important to remember that the flour used in the first and second dough batches plays a crucial role in the success of the Easter Colomba. For this reason, we recommend using a professional pâtisserie flour specifically formulated for highly leavened products, which offers excellent strength and stability.
At the end of the second kneading, the dough should be stringy, shiny and stretchable, as shown in the images in Figure 3.

At this point, it’s time to answer a question that, when this Easter cake was born, wasn’t even considered: how to fill the Colomba?
The classic version, in fact, leaves no room for imagination, it is characterized exclusively by the presence of candied citrus fruits (from 15 to 25% of the total weight of the mixture). For its preparation, the use of a refractometer is highly recommended, which, by measuring the Brix levels, is capable of evaluating the correct degree of candying.
Today, Colomba without candied fruit is increasingly popular as are the inclusion of other special ingredients that must be carefully studied before being included in the recipe.
Should you, for example, wish to make a chocolate or pistachio Colomba, remember that these ingredients remove moisture from the dough, so it’s advisable to increase the water amount slightly to ensure that the dough remains soft and fluffy. Chocolate should not exceed 10% of the total weight of the dough; the same goes for a pistachio Colomba, which should be filled with no more than 2-3% pure pistachio paste and 7-8% chopped pistachios.
Step 3: from the portioning to the proofing of the classic Colomba
The second dough, once finished, should be left covered with nylon film at 28 °C for 30 minutes and then for a further 20 minutes at room temperature uncovered, so that it loses some humidity.
Now proceed with the portioning. Each portion should weigh 10% more than the capacity of the mold you’re using. For example, a 1,000g Colomba mould will require 1,100g of dough.
At this point, you need to begin shaping the dough, one of the phases where the difference with preparing panettone is most evident. To give the Colomba its classic dove shape, you need to divide the portions you just made into two pieces, but pay attention to the proportions: the wings should be ⅖ of the total weight of the dough and the body ⅗. Going back to the previous example, of the 1,100 g of dough, 440 g should be used for the wings and 660 g for the body. These ratios are fixed because the baking cups used for making Colomba are available only in standard sizes.
Once the dough has been shaped, you can proceed to the next phase in which it is very important to apply the correct manual skill: rounding. This is a very delicate step because it creates tension in the dough structure, compacting the gluten network. Rounding should be done with cupped hands, rotating the dough on a steel surface until it is smooth and homogeneous. A tip is to repeat this process twice, 10 minutes apart, to give the dough more strength and structure.
Once done, place the dough pieces into the moulds: insert the wings and then top with the body. A tip is to tuck the two portions of dough along their edges to encourage the dough to rise.
Then, cover the moulds with a nylon film and let them rise at a temperature of 28 °C until the top of the dough rises above the top of the paper cups. Then, uncover the Colomba for about fifteen minutes: this precaution, as we’ll see, will make all the difference when decorating them.
The rising process will take 4 to 6 hours in total, and the Colomba should look like the one in the following photo.

What if the Colomba doesn’t rise?
At this point in the article, we have all the information to answer one of the most frequently asked questions that arise when a recipe doesn’t turn out well: why doesn’t the Colomba rise?
This question may seem difficult to answer, but in reality it can be solved by a process of elimination, since the main factors that lead to proofing are the sourdough starter and temperatures.
If the sourdough starter “blossomed” as described in the dedicated paragraph, then it had sufficient proofing capacity. The cause of the Colomba’s failure to rise can therefore be attributed to the proofing temperatures, which must respect those indicated throughout the article.
A clarification for those who prefer to base their recipe on biga: all proofing temperatures indicated should be lowered by 2 °C.
Step 4: Garnishing and cooking the classic Colomba
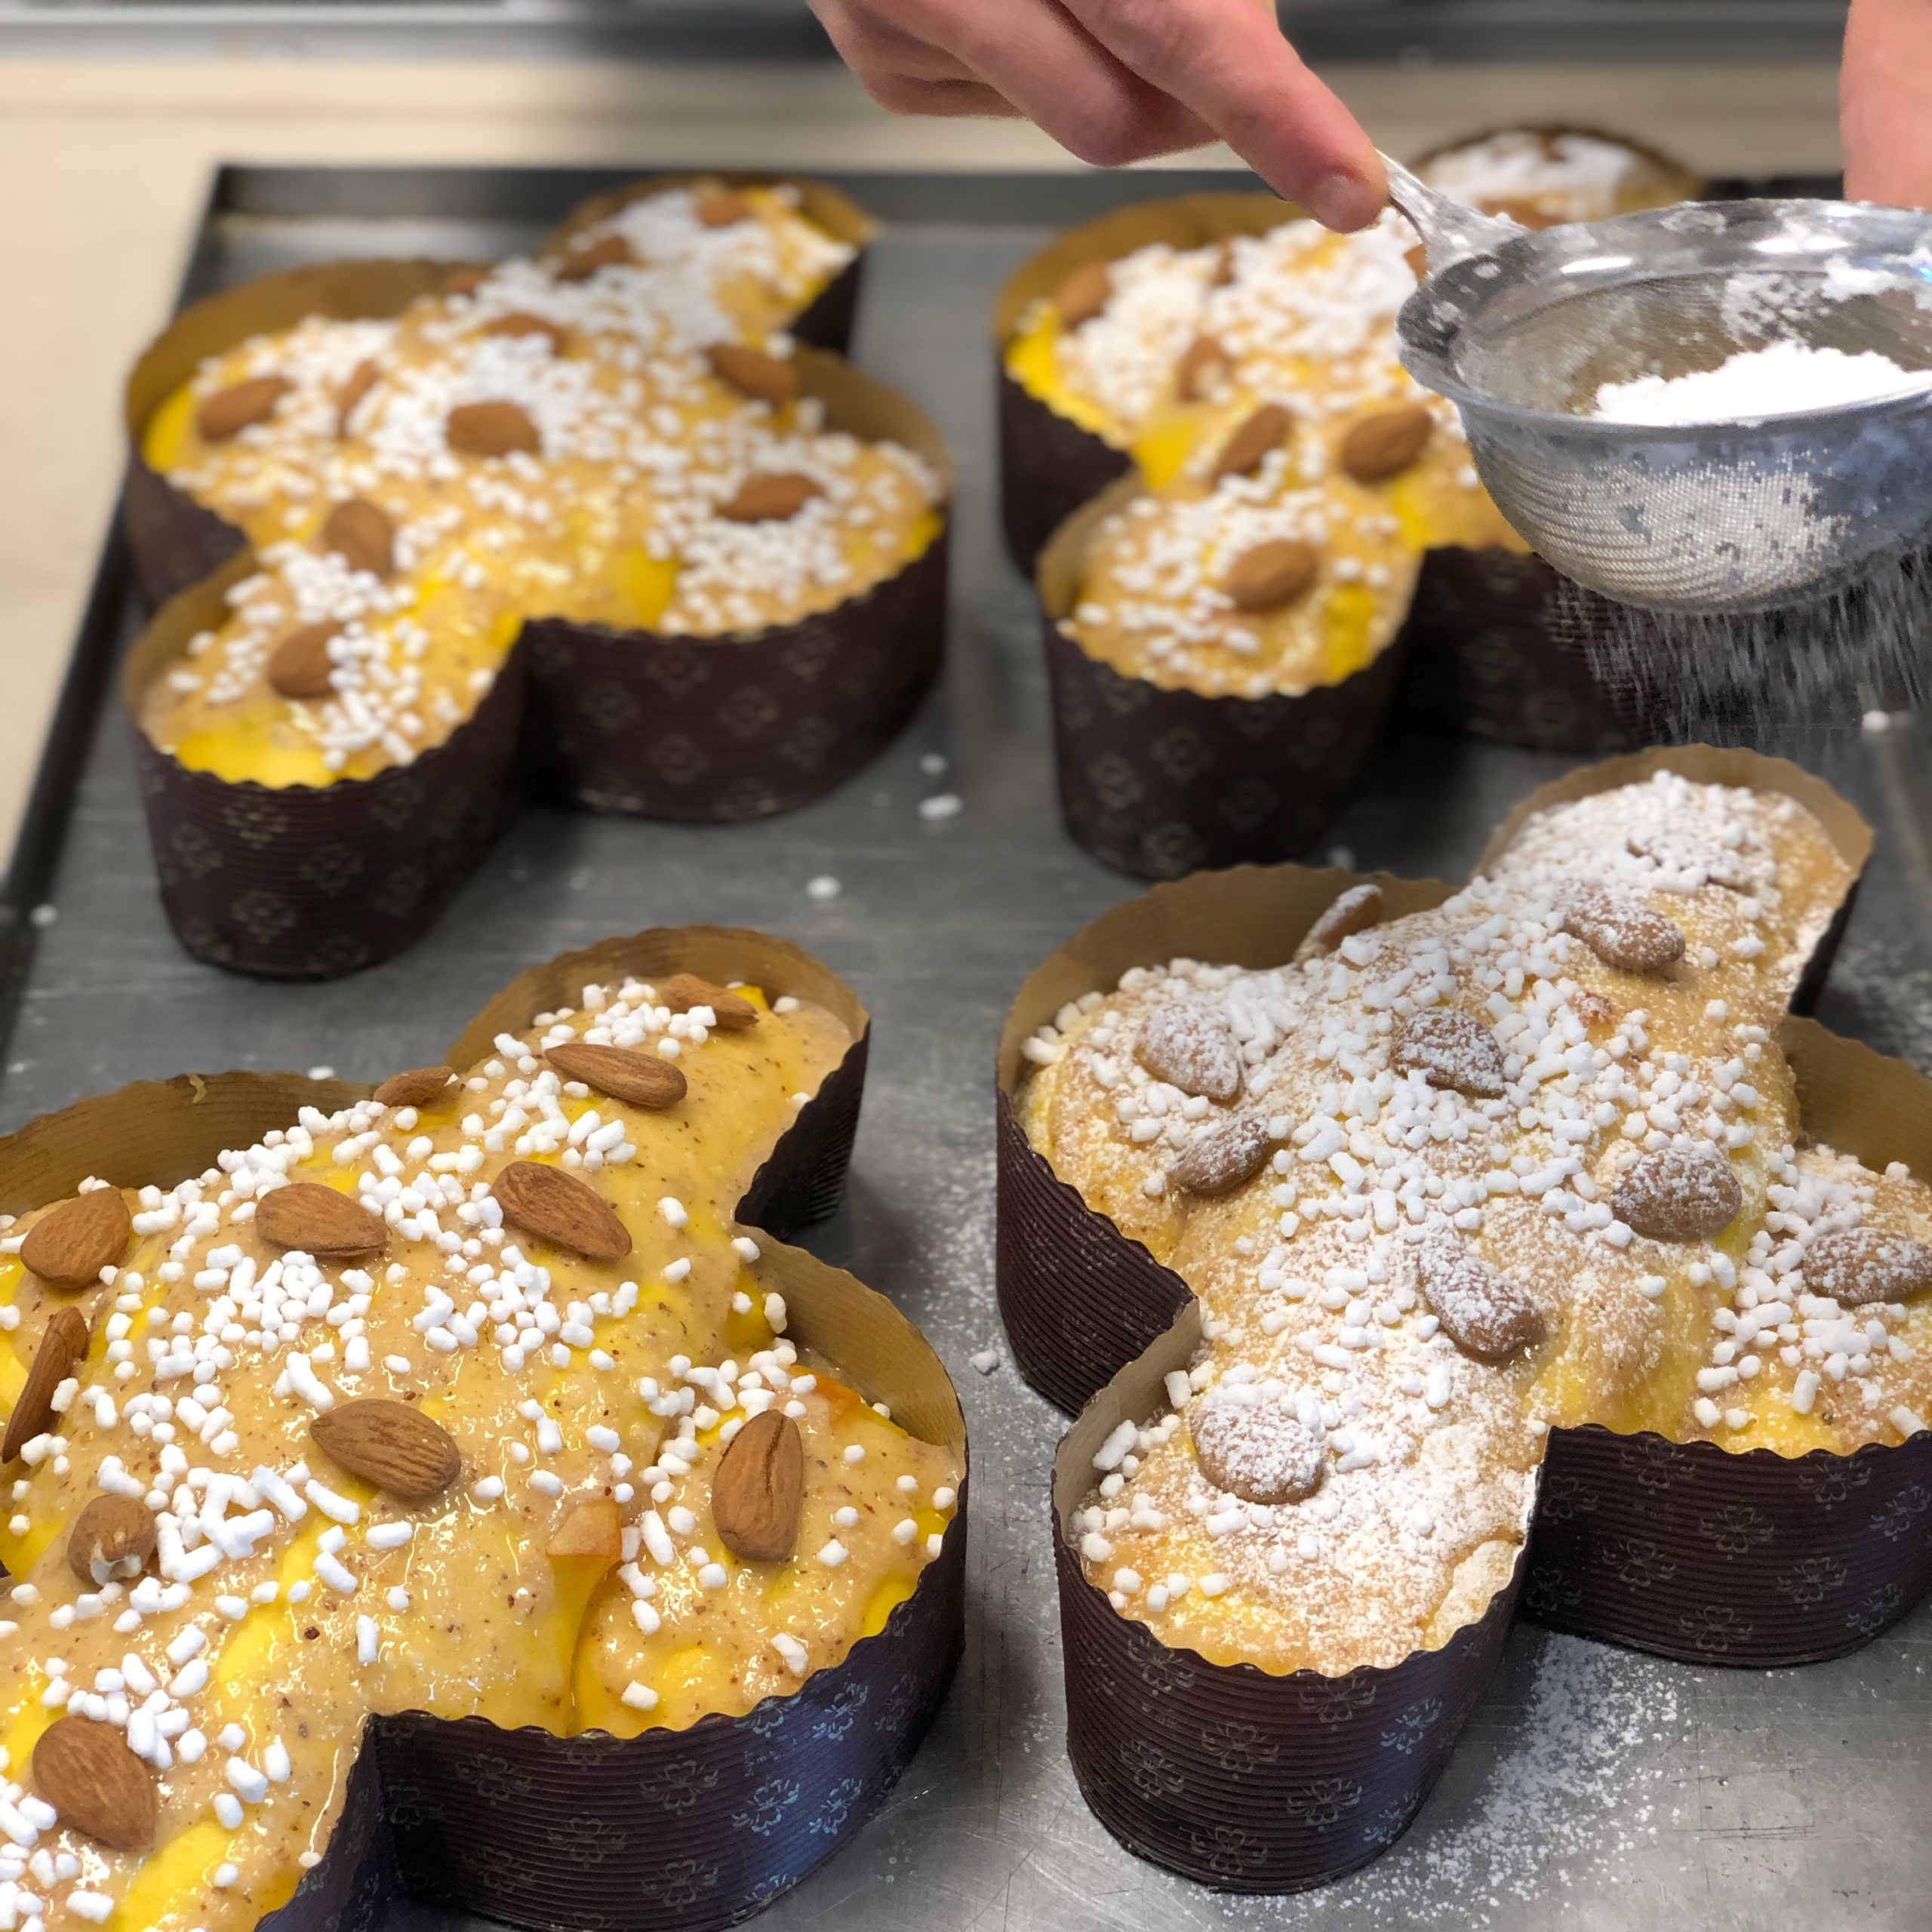
Before baking, spread the icing, prepared 24 hours earlier, over the risen Colomba cakes using a piping bag with a flat nozzle. The icing, besides being a distinctive element of the Easter Colomba, also serves an important technical function: it prevents the formation of a crust on the proofed cakes by shielding them from direct heat, thus improving their development and internal softness.
In the previous paragraph, we emphasized the importance of uncovering the Colomba during the last 15 minutes of proofing. This will help the surface of the dough lose moisture, allowing the glaze to adhere more firmly, and preventing it from peeling off after baking.
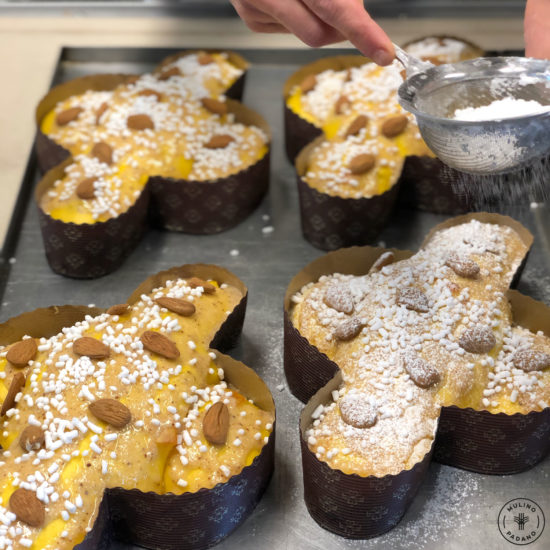
Before baking, all that’s left to do is sprinkle the surface with sugar granules, a few unpeeled almonds, and the inevitable icing sugar, which is essential for giving the Colomba its classic appearance.
The Easter Colomba should be baked at 170 °C and is considered cooked when the core temperature reaches 94 °C, which can be measured with a probe thermometer. Cooking times vary from oven to oven, but we can provide the following guidelines:
- or 500g moulds approximately 35 minutes
- for 750g moulds approximately 45 minutes
- for 1,000 g moulds approximately 55 minutes
For a homemade Easter Colomba, it could be useful to bake it in a static oven preheated to 200 °C, and subsequently lower the temperature to 180 °C after 10 minutes.
Baking is over: only the details are missing
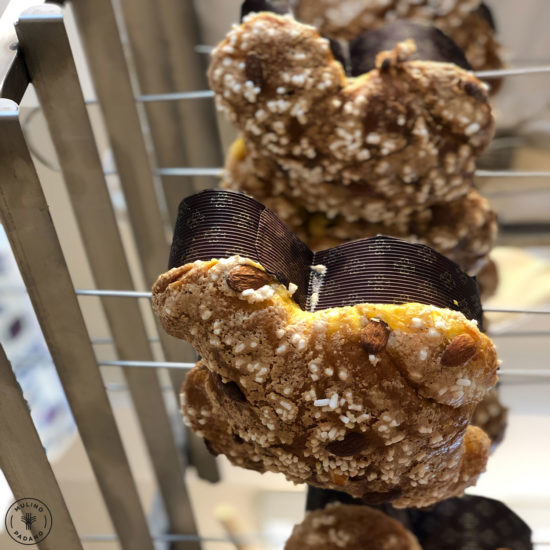
Once baked, immediately pierce the Colomba through the bottom of the paper mould, and turn them upside down until they’re completely cool, which will take 3-4 hours. Immediately, wrap them in nylon bags to prevent the leavened dough from drying out upon contact with the air.
An Easter Colomba made with sourdough starter or li.co.li, without preservatives, has a shelf life of about 15 days. If the preparation is based on a biga, the shelf life decreases by a few days. If you want to know more about shelf life, then we suggest reading our article in which we explain how to store highly leavened products.
At this point, the final question we can ask ourselves is: how should we serve the Easter Colomba to enhance its characteristics and flavour? The best strategy is to place it whole, uncut, near a heat source for about ten minutes. This will soften the butter, enhance the aromas, and improve the texture.
- Do you want to try out these secrets?
Try our type “00” Panettone flour, which you can find in the section dedicated to the best flours for pâtisserie. In our online shop, you’ll find type “00” Panettone flour in small sizes.
- Are you a pâtisserie professional?
Contact us to learn more about our flours.